
How to Switch From Squarespace to WordPress (Step by Step)
Do you want to transfer from Squarespace to WordPress? Are you wondering how to do it without losing your content? You may have a basic site on Squarespace that needs to be upgraded on a better platform for more features. In this tutorial, we will share how to switch from Squarespace to WordPress.
Squarespace is a simple and easy to use. You can create your basic sites on it. However, as your business grows you need a more powerful and robust platform like WordPress. It allows you to create big websites with great features.
To switch from Squarespace to WordPress, you’ll need to follow these 6 steps:
- Step 1. Select a web hosting for your new WordPress site
- Step 2. Setup WordPress on your new web hosting
- Step 3. Export all the content from Squarespace
- Step 4. Import your Squarespace content into WordPress
- Step 5. Import images from Squarespace to WordPress
- Step 6. Manage the URLs in WordPress
Ready to get started? Let’s go!
Step 1: Select a Web Hosting For Your New WordPress Site
Since your site was on Squarespace servers, the first thing that you need to do is to buy a good WordPress hosting. We recommend Bluehost and Hostgator.
Both these companies provide managed WordPress hosting, so you don’t need to worry about your website. You should also check out this guide on comparison of multiple WordPress hosting companies. For our customers, they offer BIG discounts.
Step 2: Setup WordPress on Your New Web Hosting
The above recommended hosting companies will allow you to install WordPress in one-click.
However, if you want to do it manually, then follow this complete guide on WordPress installation on your site.
Step 3: Export All the Content From Squarespace
Squarespace has limited features, so it won’t export all the content. You need to manually add the other content on your WordPress site.
Your pages, posts, gallery pages, text, images, and embed blocks will be exported through Squarespace.
If your site has online selling functionality, then you need to manually add the product pages in WordPress. Audio and video content, custom CSS, folders, image albums, index pages, and multiple blog pages will need to be uploaded manually on your new WordPress site.
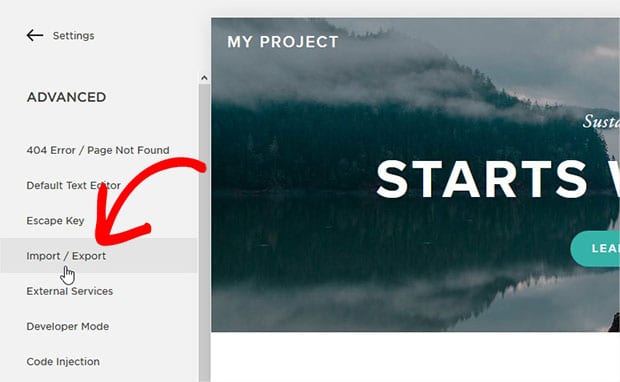
To export content from Squarespace, go to Settings » Advanced » Import / Export.
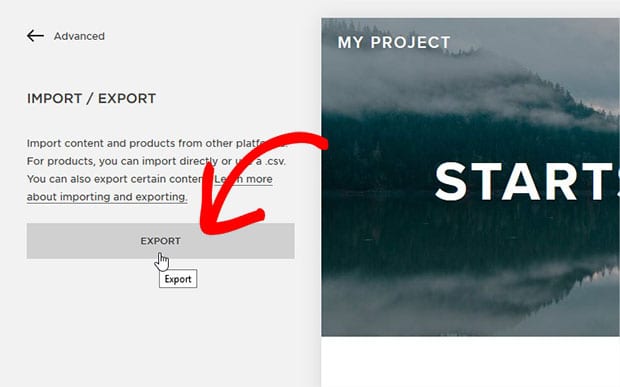
Now hit the Export button in the sidebar.
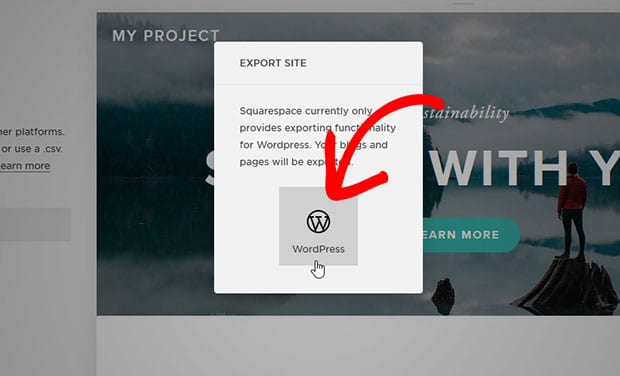
A popup will appear with the option to select WordPress. Squarespace currently only provides exporting functionality for WordPress.
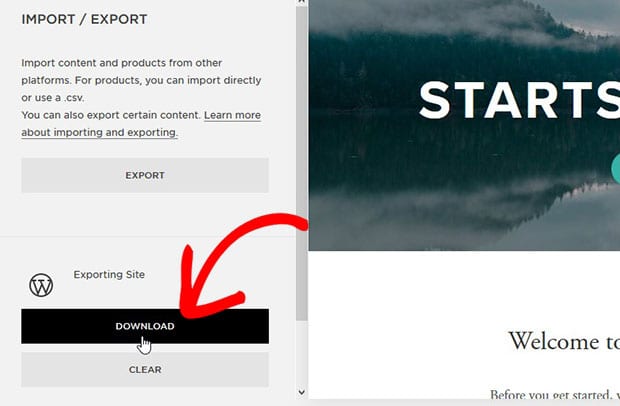
Once the export is complete, simply click on the Download button in the sidebar. It will save an XML file on your computer.
Next you can go ahead and import this Squarespace content into your WordPress site.
Step 4: Import Your Squarespace Content into WordPress
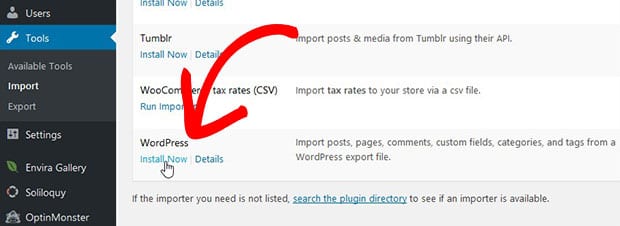
To import your Squarespace content in WordPress, simply login to your WordPress admin and go to Tools » Import.
There are multiple importers available. You need to click on the Install Now link under WordPress.
Then click on the Run Importer link.
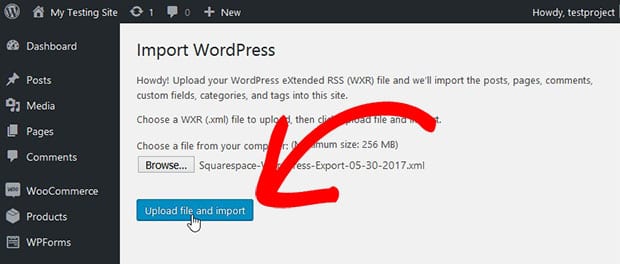
Once the importer is active, you should click on the Browse button to add the XML file of your Squarespace content. Next you need to click on the Upload File and Import button.
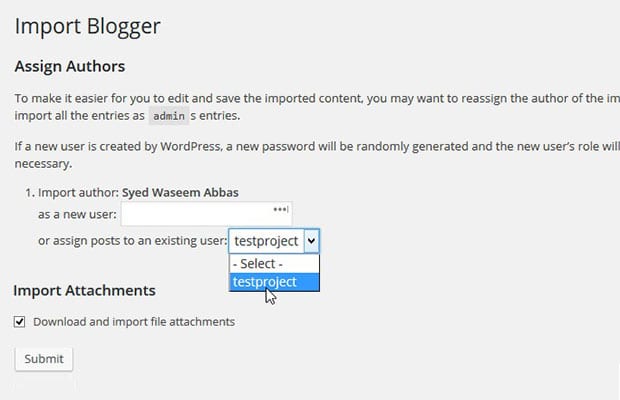
After uploading the XML file, you need to pick the author in WordPress for the content. You should also check mark Download and import file attachments.
Now click on the Submit button.
All your content is successfully imported in WordPress. You need to import the images in the next step.
Step 5: Import Images From Squarespace to WordPress
The above XML file will import all the pages, posts and other content from Squarespace to WordPress. However, if you want to import images, then simply use Import External Images plugin.
After importing the images, you can create beatiful image sliders in WordPress.
Step 6: Manage the URLs in WordPress
Since you are moving your site from Squarespace to WordPress, you need to make sure that the URLs in WordPress are similar to Squarespace to avoid losing your search engine rankings.
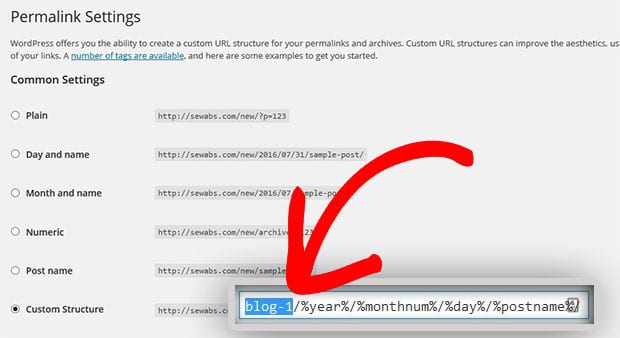
Squarespace websites has blog-1 prefix in their links, and the URLs are in year/month/day/post-name format.
To change the URL structure in WordPress, you need to go to Settings » Permalink and select Day and Name option.
After choosing the Day and Name option, click on the Custom Structure and add blog-1 prefix. It will automatically select the Custom Structure option.
Now your Squarespace visitors will reach to the right pages/posts in WordPress.
For other content like your ecommerce products and pages, you need to use the WooCommerce plugin. And, you should use Youtube or Vimeo to embed videos in WordPress.
We hope this tutorial has helped you to learn how to completely switch from Squarespace to WordPress. You may also want to check out our guide on how to import and export Soliloquy image sliders and read about ultimage WordPress SEO guide for beginners to manage your site’s search engine rankings.
If you like this tutorial, then please follow us on Facebook and Twitter for more free WordPress guides and resources.



Marta
Agree with you, the flexibility of WordPress is impressive. Have you tried the automatic way of website transfer? CMS2CMS is one of them and I really enjoyed the quickness