Beginners Guide to Add Custom Image Sizes in WordPress
Do you want to use your own custom sizes for WordPress images? You may need to upload and edit images in WordPress to the size you require for thumbnails and featured photos. In this tutorial, we will share how to add custom image sizes in WordPress.
By default, WordPress has its default image sizes, so when you upload an image it creates additional files for these default sizes. Having your own custom sizes can save you hours in editing your photos outside WordPress.
Note: This tutorial is a bit more advanced than our usual tutorials, and will require you to edit the code of your site.
To add custom image sizes in WordPress, you’ll need to follow these 4 steps:
- Step 1. Edit your theme’s function.php file and add image sizes
- Step 2. Add the code in theme file to display custom sizes
- Step 3. Regenerate thumbnails for previously uploaded images
- Step 4. Use your custom image sizes in WordPress post insertion
Ready to get started? Let’s go!
Step 1: Edit Your Theme’s Function.php File and Add Image Sizes
First you’ll need to add some code to the functions.php file of your website. If you’ve never done this before, you can check out this beginner’s guide to pasting code snippets to your WordPress site.
You should make a backup of your site first before making any changes to the code.
The fastest way to add the code is by going to Appearance » Editor and edit the functions.php file of your theme. Simply paste this script there:
[php]add_theme_support( ‘post-thumbnails’ );
[/php]Make sure to click on the Save button. The above script will enable the add_image_size() function, so you can add new WordPress image sizes.
Here are the few examples that help you add custom image sizes on your site:
[php]add_image_size( ‘post-thumbnail size’, 800, 240 );
add_image_size( ‘homepage-thumb size’, 220, 180 );
add_image_size( ‘fullpage-thumb size’, 590, 9999 );
In these examples, you can choose the name (like post-thumbnail size) of your choice to add the image sizes to your theme. The numbers like ‘800’ and ‘240’ are the width and height respectively.
You should add your required width and height for WordPress thumbnail sizes.
Step 2: Add the Code in Theme File to Display Custom Sizes
After adding the new image sizes, the next thing you need to do is to display your custom sizes in WordPress theme.
Add this code in the theme file inside the post loop where you want to show your thumbnail:
[php]<?php the_post_thumbnail( ‘your-specified-image-size’ ); ?>
[/php]In this code, you need to change ‘your-specified-image-size’ with the image name you set in the previous step (like ‘post-thumbnail size’). Use this code in your theme files to display your custom image sizes.
Step 3: Regenerate Thumbnails For Previously Uploaded Images
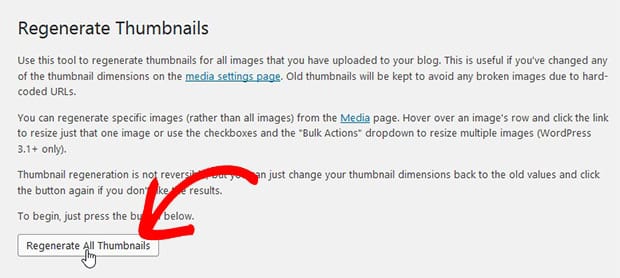
Next you need to regenerate thumbnails in WordPress, so all your previously uploaded images will be updated to the new thumbnail sizes.
We recommend you to use the Regenerate Thumbnails plugin. It will update your WordPress images to the custom sizes you added in previous steps.
To learn about plugin installation, check out this guide on how to install a WordPress plugin.
After activating the plugin, you need to go to Tools » Regen. Thumbnails and hit the Regenerate All Thumbnails button.
It will regenerate all your images in WordPress.
Step 4: Use Your Custom Image Sizes in WordPress Post Insertion
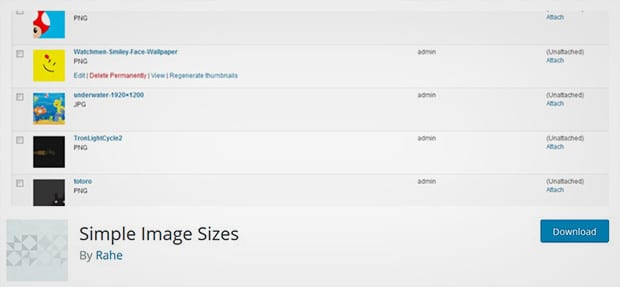
To insert your additional image sizes by posts in WordPress, you need to install and activate Simple Image Sizes plugin.
Upon activating the plugin, you need to go to Settings » Media and check mark Show in post insertion? for all your new image sizes that you want to use in WordPress posts.
You’ll see a blue Update button once you enable post insertion for any custom image size. Simply click on it.
It allows you to add photos in your post content using your defined image sizes.
We hope this tutorial has helped you to learn how to add custom image sizes in WordPress. You may also want to check out our guide on how to customize your WordPress permalinks.
If you like this tutorial, then please follow us on Facebook and Twitter for more free WordPress guides and resources.


Carl H
It is not clear to me. So where is this loop I should be adding it to? Lets say I added a 750×750 thumbnail, I want to see that option in the editor when I add media but I have bough added this in fucntions and then also regenerated it all but all i see if FULL SIZE and custom size. I want to crop and resize stuff to 750×750.
jeff wilkerson
This is how you add your custom image size to the Editor so you can choose it.
https://developer.wordpress.org/reference/functions/add_image_size/#for-media-library-images-admin
Mona Abou Samra
Very helpful
Jan Bachop
Thank you, this worked great!
Ready to start creating slides the easy way?
Get Soliloquy NowWe use cookies to improve your experience on our site. By using our site, you consent to cookies.