
How to A/B Test Your WordPress Featured Images
Are you wondering which featured image will perform better for your post? You may need to test your featured photos to know which image can attract more users on your blog. In this tutorial, we will share how to A/B test your WordPress featured images.
Featured images are great for your WordPress posts. It’s the first thing that your users will see when they visit your blog, and it helps you to improve your SEO rankings.
By default, you can’t add more than one featured image to a single post. However, you can run the test by using a simple WordPress plugin like Plugin A/B Image Optimizer.
To A/B test your WordPress featured images, you’ll need to follow these 4 steps:
- Step 1. Install and activate Plugin A/B Image Optimizer WordPress plugin
- Step 2. Add a new post in WordPress or edit an old post
- Step 3. Add two images in the featured image widgets of your post
- Step 4. Monitor the performance of your featured images in WordPress
Ready to get started? Let’s go!
Step 1: Install and Activate Plugin A/B Image Optimizer WordPress Plugin
The first thing you need to do in the start is to install and activate Plugin A/B Image Optimizer plugin on your WordPress site.
To learn more about plugin installation, check out this amazing guide on how to install a WordPress plugin.
Step 2: Add a New Post in WordPress or Edit an Old Post
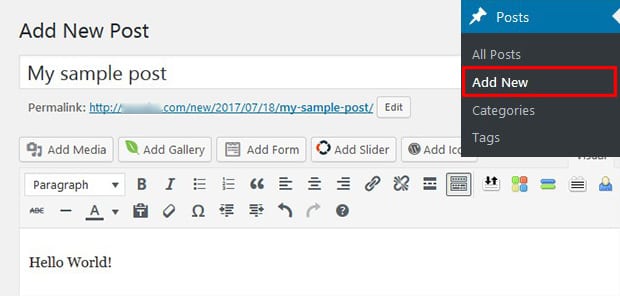
Once this addon is activated, you should go to Posts » Add New or go ahead to Posts tab and edit an existing one.
Step 3: Add Two Images in the Featured Image Widgets of Your Post
If you know about WordPress posts settings, then you should also know that it allows one featured image for one post.
The Plugin A/B Image Optimizer plugin will add another featured image widget area, so you can upload two featured images for one posts in WordPress.
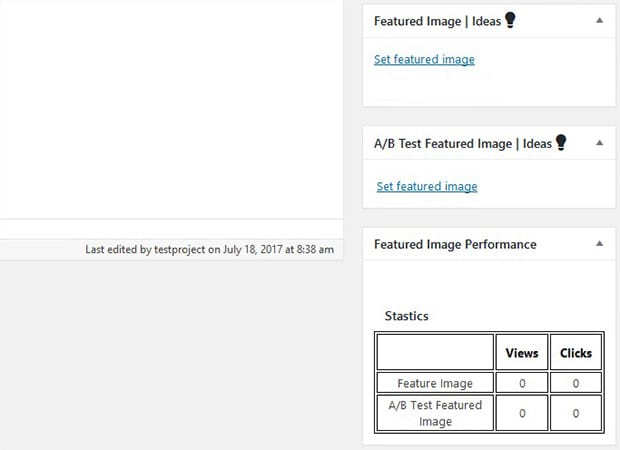
Simply add the two featured images in these widget areas. These two featured images will be displayed randomly to your visitors, and you can see the statistics in the Featured Image Performance widget.
Step 4: Monitor the Performance of Your Featured Images in WordPress
After adding the featured images, you can go to Settings » A/B Settings Page to monitor the performance.
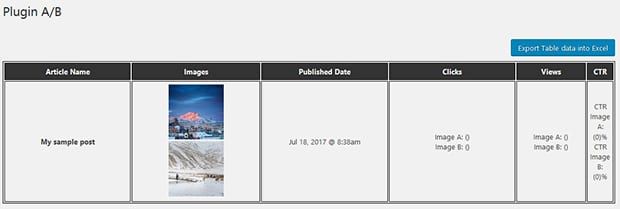
It will show you the collective performance for featured images of all the posts. However, you can see the individual performances in the Featured Image Performance widget inside each post as we shared in the previous step.
The image with best performance can be used as your featured photo for the post.
We hope this tutorial has helped you to learn how to A/B test your WordPress featured images. You may also want to check out our guide on how to verify Pinterest in WordPress. If your have a large number of abandoning visitors on your site, then you should check this OptinMonster’s powerful exit-intent technology to convert your visitors into subscribers and customers.
If you like this tutorial, then please follow us on Facebook and Twitter for more free WordPress guides and resources.


